Getting Started Guide
Overview@
This getting started guide will explain how to launch a NetFoundry Zero Trust Networking into the GCP compute engine.
Launching an instance in GCP@
Pre Deployment@
Important
The BYOL (Bring Your Own License) licensing model is one that relies on your purchasing a software license separately from our website here and registering your appliance with generated one time key.
Important
Assumption is that the NF Fabric is already up.
Deployment of Appliance@
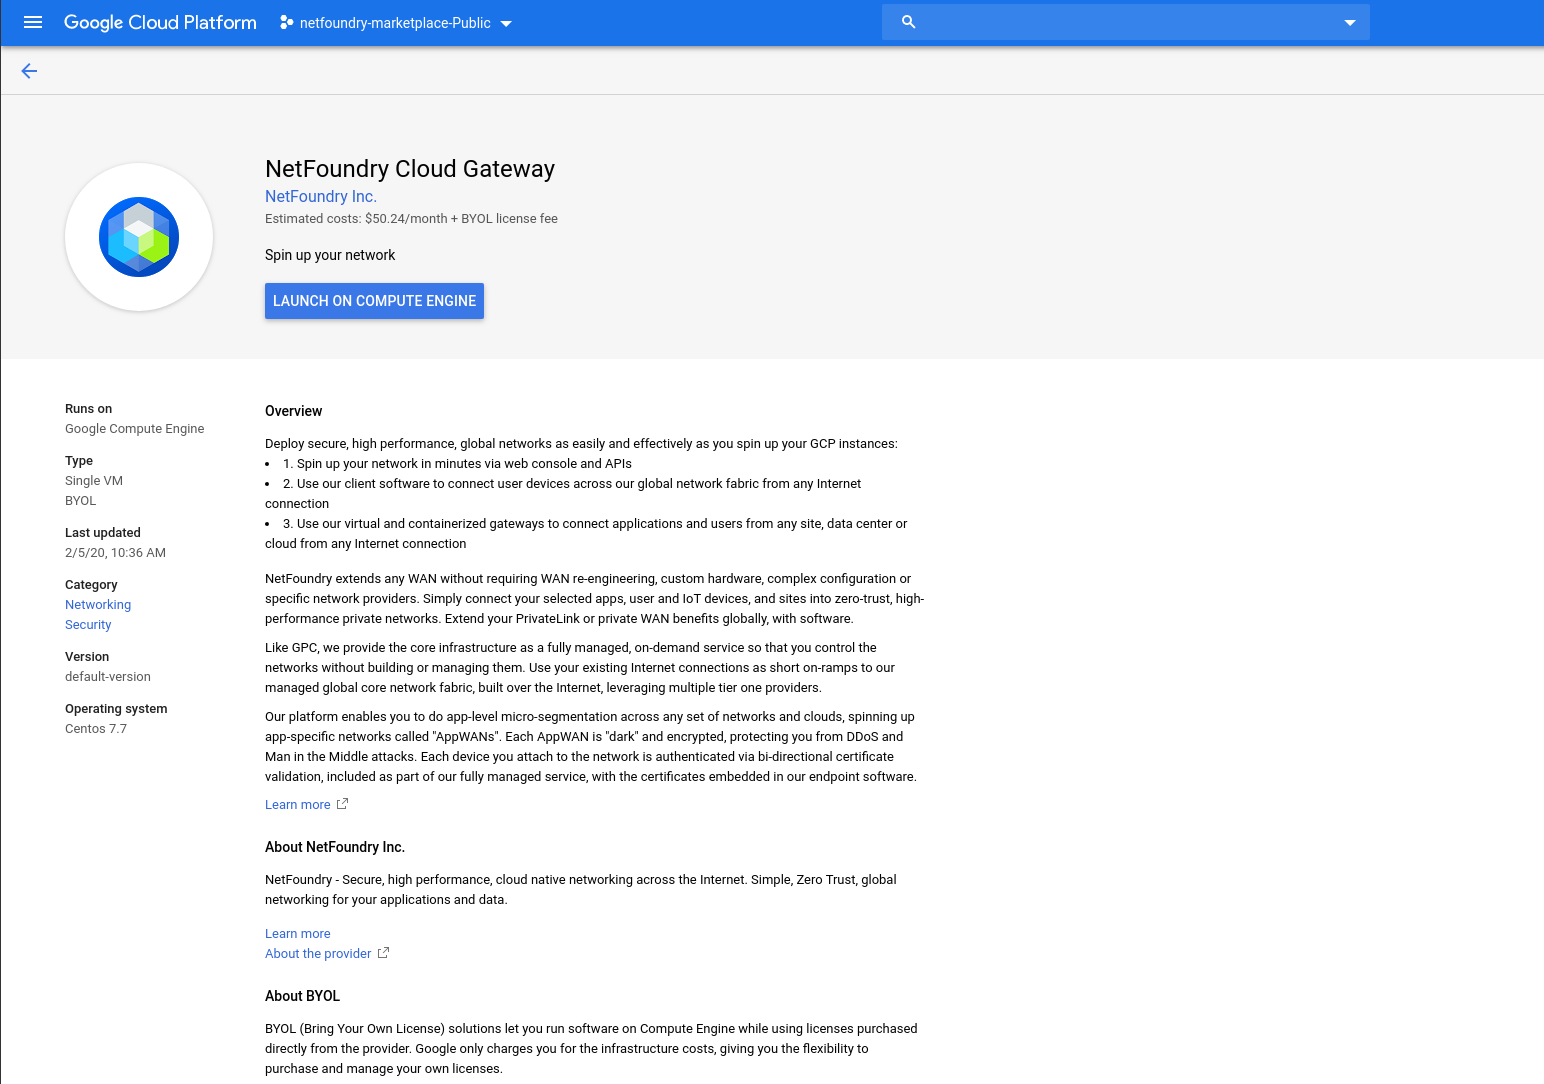
To get started, visit the GCP Marketplace site by clicking here. If the marketplace doesn't come up, you can go to the search bar that appears, enter NetFoundry Zero Trust Networking and click the resulting solution that appears.
To launch the instance Click on "Launch On Compute Engine"
Supply the information needed
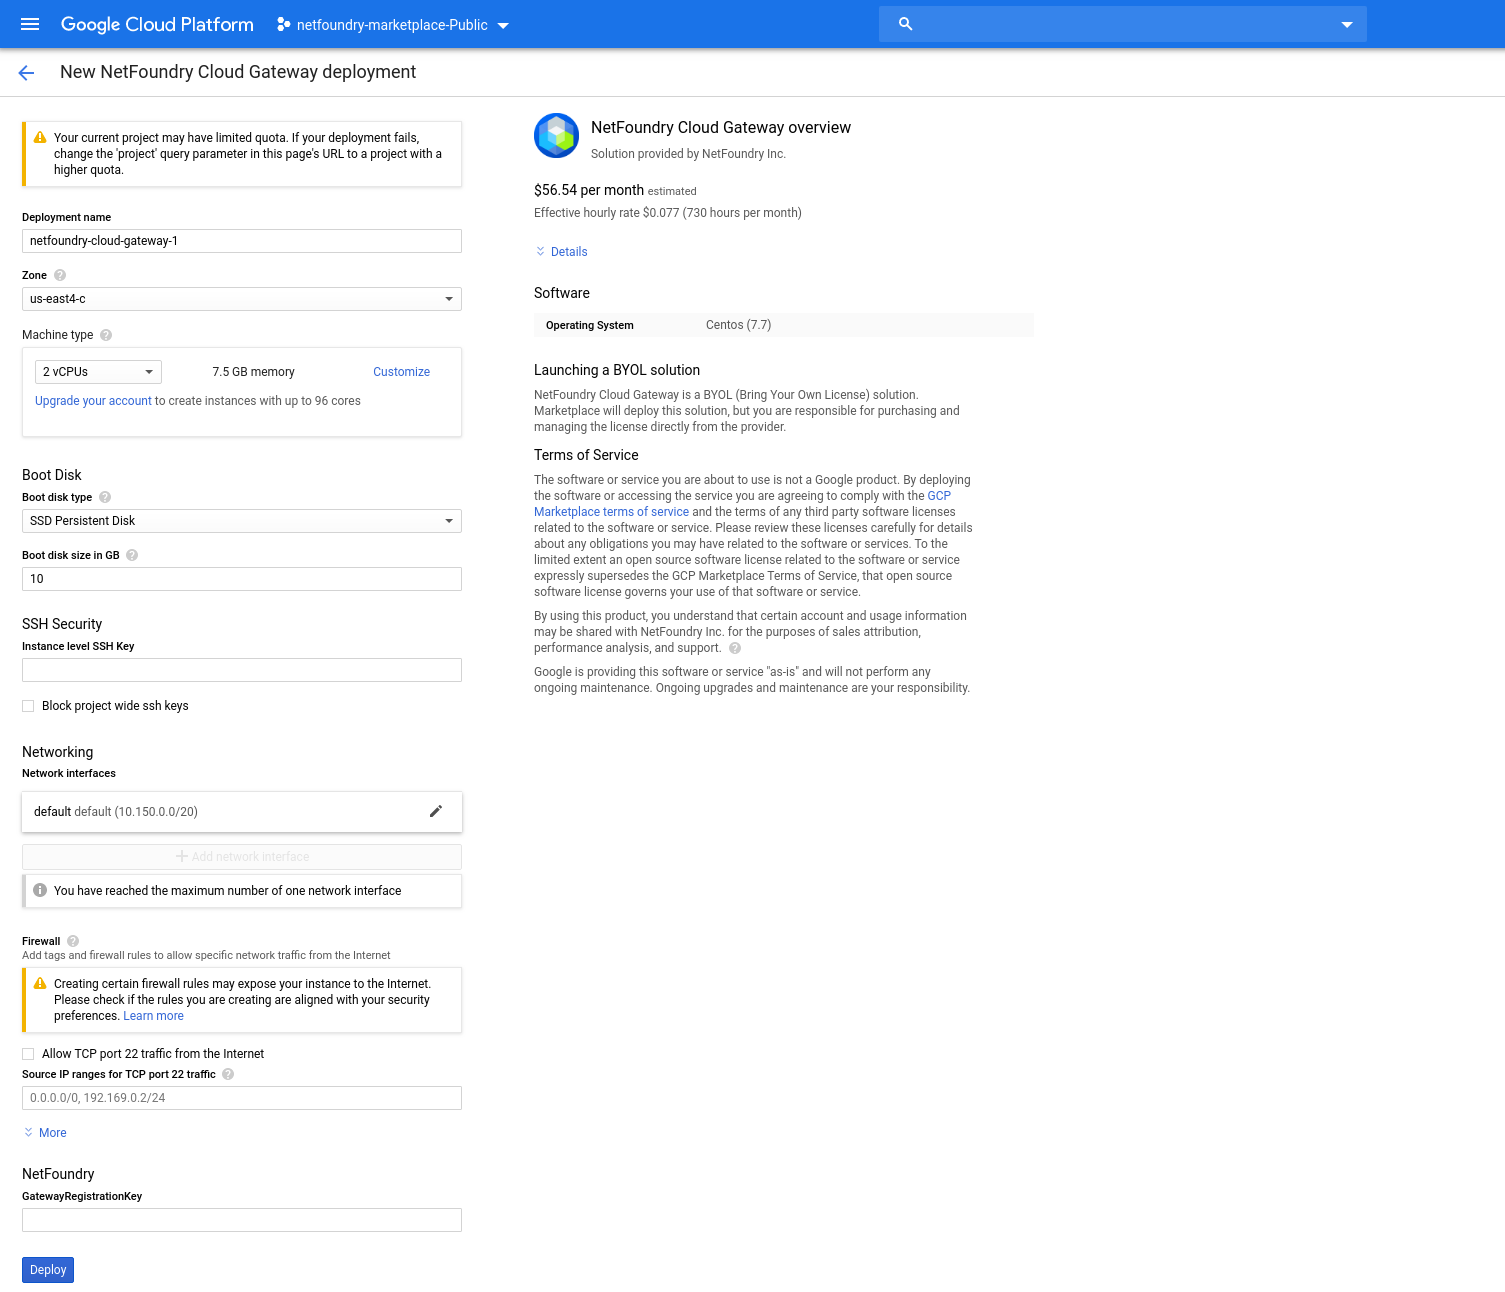
Launch Options@
- Deployment name: Specify the name of the instance you would like to use.
- Zone: Specify the region you would like to launch your appliance.
- Machine type: The instance type and size for your appliance. For optimal performance, it is recommended that small (2 vCPU/8 GB RAM) is chosen, or better.
- Boot disk type: SSD Persistent Disk is appropriate for the appliance since there is minimal disk I/O for the instance.
- Boot disk size in GB: The instance by default comes with a 10 GB boot disk.
- SSH instance level key: (OPTIONAL)If you would like to apply an instance level ssh key.
- Block project wide ssh keys: (OPTIONAL) If you would like to prevent the project keys from being applied to this instance.
- Network name / Subnet name: The network you would like to place your appliance in.
- Firewall: (OPTIONAL) If you would like to allow ssh access to your instance, please check the box & fill out the restricted source ip/networks. We do not recommend leaving this open to 0.0.0.0/0 if you choose this option.
- IP forwarding: Must be set to on, if you would like to reach applications within your networks.
- GatewayRegistrationKey: (OPTIONAL) This field allows you provide the gateway registration key that will passed into the launching image. Automating the registration portion of the setup. You can access the gateway via ssh & register after this deployment is complete. Learn how to get a registration key here.
Once the fields have been supplied, Click on "Deploy"
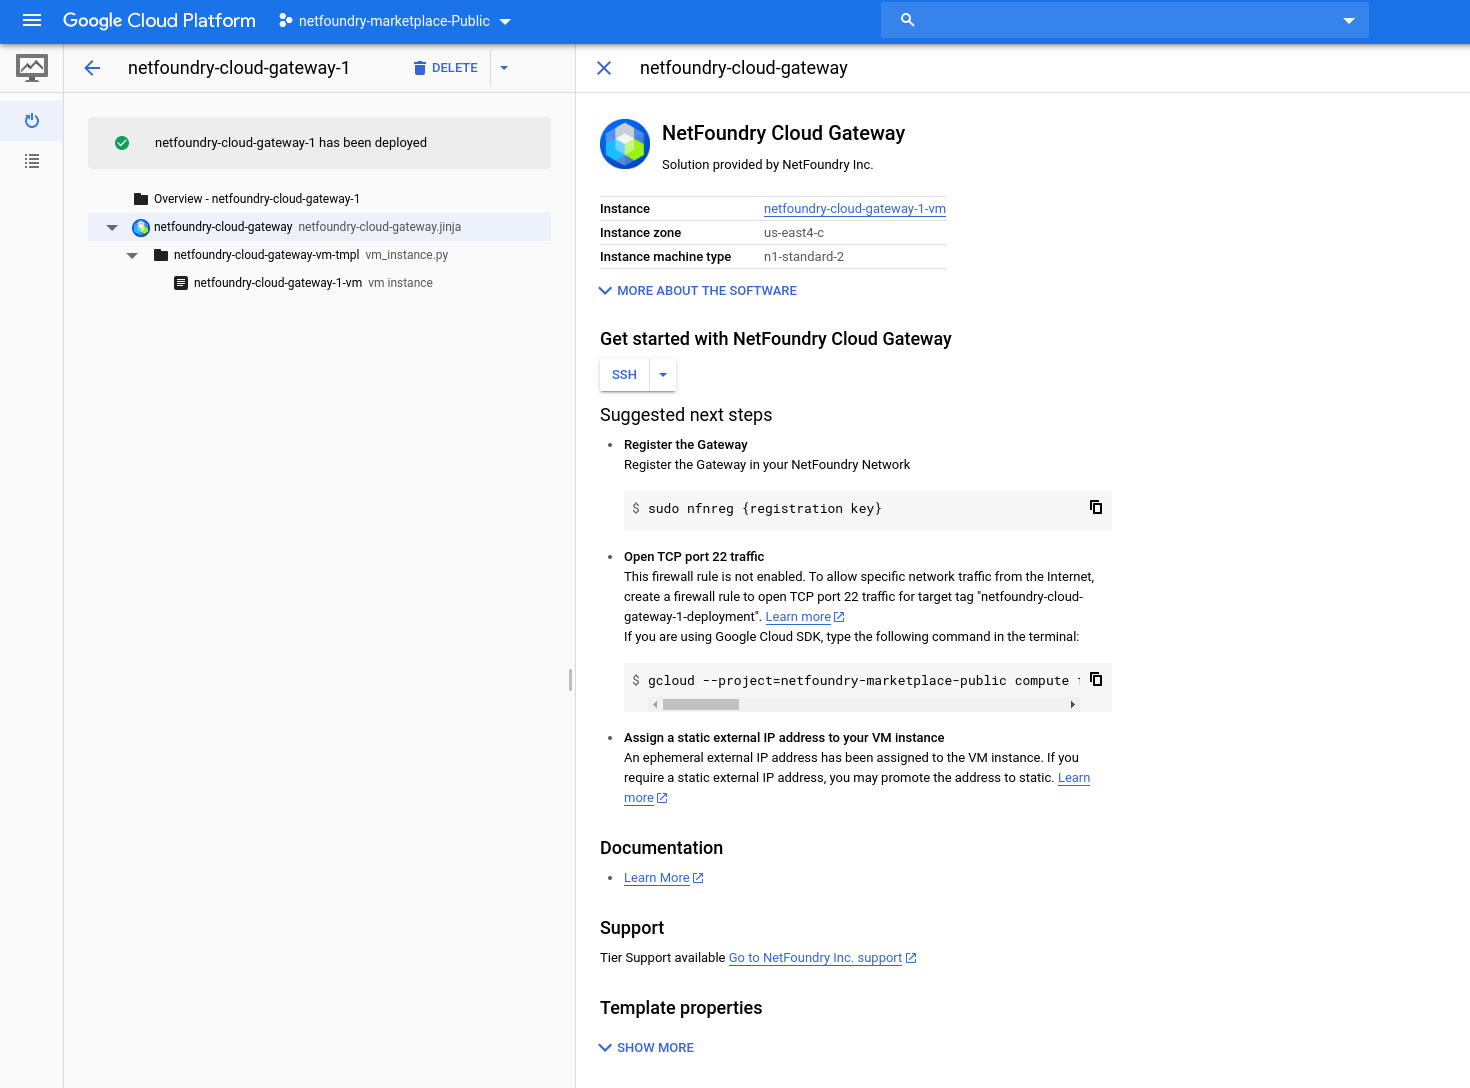
Post Deployment@
If you did not supply the GatewayRegistrationKey field during the deployment, you can access the machine via ssh by Clicking on the "SSH" button. OR You can optionally access this from other ssh point if you enabled the firewall rules to do so.
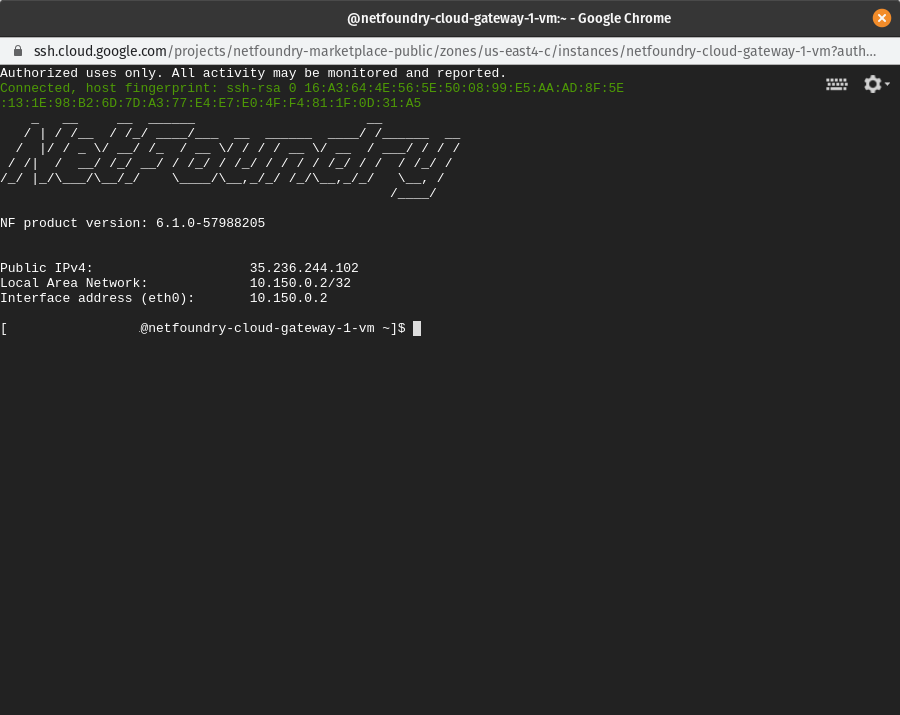 Use the following command to register the gateway with your network:
sudo nfnreg {registration key}
Setup is complete.